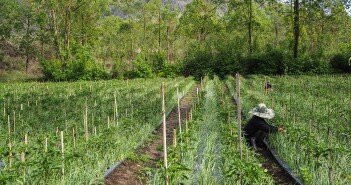
At Caroola, we planted 100kg of garlic and harvested 600kg. We planted approximately 14,000 garlic seeds, a large-scale experiment for a small scale-farm. It was a great learning experience, which was not as easy as you might think. Here are our mistakes, solutions and advice to plant, grow, harvest, store and preserve Garlic.
Australia imports lots of Garlic from Argentina, Mexico or China so lets plant garlic!
Garlic plants of the same variety are usually all ready at once and they require processing straight after harvesting to dry out properly. The most important lesson we learn is to not bite off more than you can chew. We planted 100kg of garlic this year but next year, only 50kg will be planted at Caroola, lesson learned! Note that every garlic variety will be different. We planted an organic Tasmanian purple turbine, which is an early variety. We could probably have planted different variety to spread out harvesting time.
Planting Garlic:
The best time to plant garlic is autumn.
Our garlic was an early variety so we could have planted the first one in March (Southern Hemisphere). Garlic will be ready for harvest 6 months after planting, latest around November. At Caroola Farm we planted some in May, June and July for testing and they were all ready at once, though the one planted late in July were smaller.
- Plant one clove 5cm deep, using your finger make a hole, approximately as deep as the second knuckle.
- You can then plant them 10cm apart in a triangle pattern.
Harvesting Garlic:
Do not leave garlic under the sun or they will ferment & rot
- Garlic will be ready all at the same time no matter when you planted them.
- Do not water them 3 days prior to harvesting and hope for no rain.
- Harvest them when their scapes have popped out
- Simply pull them out by their leaves and use a small spade if there is resistance, over wise you might break the leaves off the bulb.
- Don’t wait too long or the leaves will start to dry out and they will be harder to pull out of the ground.
- As soon as you pulled them out of the ground, peeled the first few layers to remove all the dirt and cut off the roots.
- You can then hang them or lay them flat on non-metallic slats. At Caroola they prefer to hang them from their leaves because they argued that the nutrient in the leaf slowly travel to the bulb.
- Do not leave them in the sun even for 30minutes after harvesting, as they will get sunburned, start fermenting, become blue and eventually rot.
These are the basics; unfortunately we had a rain event just before they were due for harvesting. We couldn’t wait for the soil to dry up again because the rain had knock the garlic down and their leaves was starting to dry out. We had to process them quickly, peeling off their leaves and cutting off their roots. We also cut off the basal plate; (the stem growing between the leaves which, will then flower and seed) to make sure we didn’t leave any particle of wet soil.
Storing Garlic
Cheap DIY Garlic Rack
- Peel the first few layers of leaves to clean and remove the particles of soil.
- Cut off the roots as close as possible from the basal plate with a garden scissor
- Cut off the scapes and keep them on the side. Do not throw them out because the garlic flower is incredibly delicious. Even if the scale doesn’t have a flower yet, it will continue to grow and form the flower even without the bulb.
- Cut off the basal plate (where the roots are attached at the bottom of the bulb) if the soil was wet when you harvested them.
- Hang them from their leaves or lay them flat on non-metallic slats so the air can circulates.
- If the soil was wet, cut off the leaves and hang them the other way around, base up and top down. That way the water from the leaves will drain out more easily.
- They will take 2 to 4 months to dry out completely.
We built a 3 levels garlic rack with old, repurposed screen doors found at the tip. We removed the mosquito net, which usually covers the slats of the door. Then using ropes in the corners of the doors, we hang 3 on top of each other leaving enough space for the garlics to hang in between.
Garlic Produces
- Garlic bulbs: Cut the leaves out so only the bulb remains and organise them by size
- Garlic seeds: Keep the biggest ones for next years crop and sell garlic seeds to other farmers.
- Braids: In Australia the harvest is just before Christmas so it is a good seller at Christmas time. Braid them straight after processing when the leaves are still green. Over wise you will have to wet the leaves before braiding to soften them so they don’t break up.
- Scape preserves: Cut them into small segment of 1 to 2 cm and freeze or preserve them in oil or vinegar
- Garlic flowers: They will grow out of the scapes even after harvesting and processing. You can just sell them fresh or preserve them in oil or vinegar. They are now my favourite part of the garlic. Separate the petals by breaking the flower apart with your fingers. Each petal is a burst of intense garlic flavour.


